
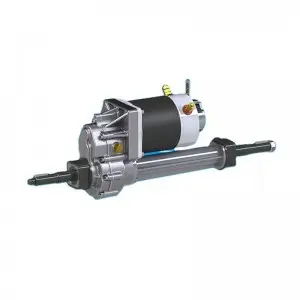
One of the most important tasks when maintaining your riding lawn mower is checking and changing the transaxle lubricant. The transaxle is a critical component that helps transfer power from the engine to the wheels, allowing the lawnmower to move smoothly and efficiently. In this blog, we’ll discuss the importance of checking and changing transaxle oil and provide a step-by-step guide on how to do it correctly.
The importance of checking and changing transaxle lubricant
Transaxle lubricant plays a vital role in ensuring the smooth operation of your riding lawn mower. Over time, the lubricant can become contaminated with dirt, debris, and other contaminants, which can cause increased friction and wear on the transaxle components. This can lead to reduced performance, increased fuel consumption, and ultimately expensive repairs.
By regularly checking and changing the transaxle lubricant, you can ensure the transaxle is running smoothly and efficiently, extending the life of your lawn mower and reducing the risk of costly repairs. It is recommended that the transaxle lubricant be checked and replaced at least once per season, or more frequently if the mower is used in extreme conditions.
How to Check and Change Transaxle Lubricant
Before you begin, it is important to gather the materials needed to inspect and change the transaxle oil. These include a drain pan, a socket wrench, a new filter (if applicable), and the appropriate type of transaxle lubricant recommended by the mower manufacturer. Additionally, it is important to consult your lawn mower manual for specific instructions and specifications.
Step 1: Locate the Transaxle
The transaxle is usually located underneath a riding lawn mower, near the rear wheels. Before proceeding to the next step, it is important to ensure that the lawn mower is on a flat and level surface.
Step 2: Drain the old oil
Using a socket wrench, remove the drain plug from the transaxle and place the drain pan underneath to catch the old oil. Allow old lubricant to drain completely before replacing the drain plug.
Step 3: Replace filter (if applicable)
If your riding lawn mower is equipped with a transaxle filter, it is important to replace it at this time. Remove the old filter and install the new filter according to the manufacturer’s instructions.
Step 4: Add new lubricant
Using a funnel, carefully add the appropriate type and amount of new lubricant recommended by the lawnmower manufacturer to the transaxle. It is important not to overfill the transaxle as this may cause problems with the operation of the mower.
Step 5: Check for leaks
After filling the transaxle, it is important to carefully inspect it for leaks or dripping water. Tighten the drain plug and any other fasteners as needed to prevent leaks.
Step 6: Test the Lawn Mower
Start your riding lawn mower and let it run for a few minutes to ensure the transaxle is running smoothly and efficiently. Test drive the lawn mower to make sure everything is working properly.
By following the steps below, you can ensure that the transaxle on your riding lawn mower is properly lubricated and maintained. Regularly checking and changing the transaxle lubricant is an important part of lawn mower maintenance and will help extend the life of the equipment. Remember to always check your lawn mower manual for specific instructions and specifications, and it’s best to consult a professional if you’re not sure you’re up to the task.
Post time: Jan-29-2024