
Welcome to this comprehensive step-by-step guide to repairing a hydraulic gear transaxle. Transaxles play a vital role in ensuring the smooth operation of various vehicles and machinery. In this blog, we’ll delve into the basics of hydraulic geared transaxles and give you easy-to-follow repair instructions.
Learn about Hydro-Gear transaxles
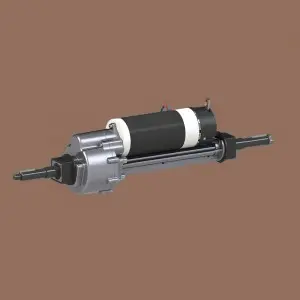
A hydraulic gear transaxle, also known as a hydrostatic transaxle, is a combination transmission and hydraulic pump. It is mainly responsible for transmitting power from the engine to the wheels or any other equipment of the vehicle. Repairing a hydraulic gear transaxle involves diagnosing and correcting issues such as leaks, damaged gears, or worn seals. Before beginning the repair process, it is essential to have the necessary tools and equipment ready, which include socket wrench sets, pliers, torque wrenches, hydraulic jacks, and sealant.
Step 1: Safety Measures
Make your safety a priority when working on a hydraulic gear transaxle. Wear protective gear such as gloves and goggles, as repairs may involve handling sharp objects or hazardous liquids. Make sure the unit is turned off and the engine is cool before servicing. Also, use an appropriate vehicle lift or jack stands to lift and secure the machine to avoid accidents.
Step 2: Question Identification
Check the transaxle thoroughly to find the problem. Common problems with hydraulic gear transaxles include oil leaks, difficult shifting, or strange noises. If there are any obvious leaks, make sure to accurately identify the source of the leak. If the problem is noise related, pay close attention to specific areas where the noise is coming from, such as input shaft bearings or gears.
The third step: disassembly and assembly of the transaxle
Depending on the problems found, you may need to remove the hydraulic gear transaxle. Follow the manufacturer’s guidelines or equipment manual to ensure proper disassembly. Note the order and arrangement of the components for easy reassembly. Make sure to clean and label all disassembled parts to avoid confusion during reassembly.
Step 4: Repair and Reassemble
After identifying the root cause and disassembling the transaxle, repair or replace any faulty parts. Replace damaged gears, worn seals, or any other worn or damaged parts. Use the correct sealant or sealant when reassembling to prevent leaks. Please take the time to follow the manufacturer’s instructions carefully to ensure proper alignment and installation. Torque fasteners as recommended by equipment specifications.
Step 5: Testing and Final Inspection
After reassembling the hydraulic gear transaxle, test the equipment to ensure proper function. Start the engine and engage the gears, watching for any unusual sounds or leaks. Monitors transaxle response and function while in use. Finally, double-check all connections, seals, and fluids to make sure everything is seated properly.
Repairing a hydraulic gear transaxle can be a challenging task, but with the proper knowledge and the right approach, you can successfully perform the task. Follow this step-by-step guide to solving common transaxle problems, and remember to prioritize safety throughout the process.
Post time: Jul-21-2023