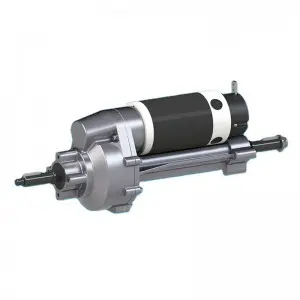
An automatic transaxle is an essential part of any vehicle equipped with an automatic transmission. It ensures efficient transmission of power from the engine to the wheels, optimizing the performance of the vehicle. However, sometimes you may experience automatic transaxle issues that cause the dreaded transaxle light on the dashboard to come on. In this blog, we discuss possible causes and provide a comprehensive guide on how to troubleshoot automatic transaxle light problems.
Learn about transaxle lights and why they are important:
A transaxle light, also commonly called a transmission light, is a warning indicator light on a vehicle’s dashboard. Its main purpose is to notify the driver of any problems or malfunctions occurring within the automatic transaxle system. Ignoring this warning light could result in serious damage affecting the overall drivability of the vehicle.
Possible causes for the transaxle light to come on:
1. Low Transmission Fluid Level: One of the main reasons for the transaxle light to come on is a low transmission fluid level. Insufficient fluid can lead to insufficient lubrication, which can lead to increased friction and heat within the transaxle system.
2. Faulty solenoid valve: The solenoid valve is responsible for controlling the movement of transmission fluid in the transaxle. A malfunctioning solenoid valve can disrupt fluid flow, causing the transaxle light to come on.
3. Sensor failure: The transaxle system relies on various sensors to monitor its performance. The transaxle light may come on if any of these sensors, such as the speed sensor or temperature sensor, are faulty or malfunctioning.
4. Electrical problems: A wiring or connection error within the transaxle system can cause incorrect readings to be transmitted to the vehicle’s computer. This can trigger the transaxle light.
To fix automatic transaxle light problems:
1. Check the transmission fluid level: First place the transmission fluid dipstick under the hood of the vehicle. Make sure the vehicle is on level ground and the engine is warmed up. See your vehicle owner’s manual for the proper procedure for checking the transmission fluid level. If it is low, add the appropriate transmission fluid up to the recommended level.
2. Scan the error code: Go to a professional mechanic or an auto parts store that offers scanning services. They can connect a diagnostic scanner to the vehicle’s on-board computer to retrieve error codes related to the transaxle light. These codes will provide insight into the specific problem and help determine the fixes needed.
3. Replace the faulty solenoid valve: If a diagnostic scan shows a faulty solenoid valve, it is recommended that it be replaced by a qualified mechanic. Depending on the make and model of the vehicle, solenoid valve replacement can vary in complexity, so professional help is usually required.
4. Repair or Replace Faulty Sensors: Faulty sensors may require repair or replacement. A mechanic will be able to diagnose problematic sensors and suggest an appropriate course of action.
5. Electrical Inspection: If the problem is with the wiring or connections, a thorough electrical inspection is required. It is recommended to leave this complex task to a skilled professional who can identify and repair any faulty wiring or connections related to the transaxle system.
The automatic transaxle light acts as an important warning indicator of any malfunction within the vehicle’s transaxle system. By understanding the possible causes and following the necessary steps mentioned in this guide, you can effectively resolve the issue and restore optimum function to your automatic transaxle. However, it’s important to prioritize your safety, and if you’re unsure or uncomfortable about performing a repair yourself, consult a professional. A well-maintained transaxle system will ensure a smooth, enjoyable ride.
Post time: Jun-28-2023


