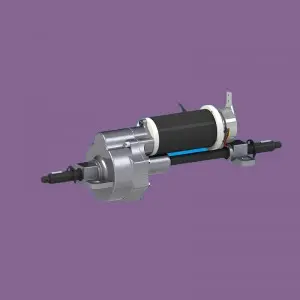
There’s no denying that your vehicle’s transaxle is one of the most important components. It is responsible for transferring power from the engine to the wheels, ensuring the smooth and efficient driving of the vehicle. Regular inspection and maintenance of transaxle fluid is essential in order to maintain its optimum function. In this blog, we will guide beginners on how to check transaxle fluid and highlight its importance for ensuring a trouble-free driving experience.
Transaxle Oil: Definition and Significance
Transaxle fluid, also known as transmission fluid, performs a variety of tasks. It acts as a lubricant, ensuring smooth shifting and preventing damage from friction and heat. It also acts as a coolant, preventing the transaxle from overheating. Regularly checking and changing transaxle fluid can avoid costly repairs, improve performance and extend the life of your vehicle’s transmission.
Step 1: Locate the Transaxle Dipstick
To begin checking the transaxle fluid, park the vehicle on a level surface and engage the parking brake. Wait a few minutes for the liquid to settle. Open the hood and locate the transaxle dipstick. It is usually labeled and located near the engine.
Step 2: Remove and inspect the dipstick
Once you have located the dipstick, gently pull it out and wipe it clean with a lint-free cloth or paper towel. Reinsert the dipstick all the way into the reservoir and pull it out again.
Step 3: Check Fluid Level and Condition
There are two marks on the dipstick that indicate the minimum and maximum fluid levels. Ideally, the fluid should fall between these two levels. If the level is below the minimum mark, it is low; if it is above the maximum mark, it is full.
Also, pay attention to the color and consistency of the liquid. New transmission fluid is usually bright red, while old or contaminated transmission fluid may appear cloudy or have a burnt smell. If the liquid changes color or has a burnt smell, it is recommended to have it checked by a professional.
Step 4: Add or Change Transaxle Fluid
If the fluid level is below the minimum mark or the fluid appears to be contaminated, the transaxle fluid needs to be added or replaced. To add fluid, locate the transaxle fluid filler cap (see your vehicle manual) and carefully pour the recommended fluid into the reservoir. Remember to add in small increments and recheck the level with the dipstick.
If you need a complete transaxle fluid change, it is advisable to consult a professional or refer to your vehicle manual, as the process may vary depending on the make and model of your vehicle.
in conclusion:
Regular inspection and maintenance of transaxle fluid is an important aspect of overall vehicle maintenance. By following the steps above, beginners can easily check fluid levels and condition to ensure their vehicle’s transaxle is in top condition. Remember to consult a professional if you experience any problems or need to change fluids. Taking good care of your vehicle’s transaxle fluid will contribute to a smoother, longer-lasting, trouble-free drive.
Post time: Jul-12-2023

