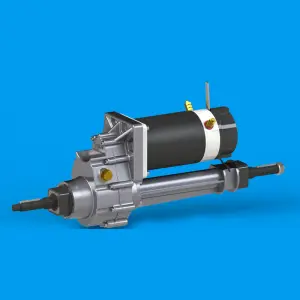
Maintaining your vehicle’s transaxle is essential to ensure its smooth operation. One of the critical aspects of transaxle maintenance is regularly checking the fluid level. The transaxle fluid is crucial for lubricating the gears and bearings within the transaxle, and keeping it at the correct level is vital for the overall performance and longevity of your vehicle. In this blog post, we will provide you with a step-by-step guide on how to check your manual transaxle fluid level.
Step 1: Park on a Level Surface
To accurately check your transaxle fluid level, you need to park your vehicle on a level surface. This ensures that the vehicle is not at an angle, which could affect the accuracy of the fluid level reading.
Step 2: Engage the Parking Brake
Before you begin checking the transaxle fluid level, make sure to engage the parking brake. This will prevent the vehicle from rolling while you are under it and ensure your safety.
Step 3: Locate the Transaxle Fluid Dipstick
Next, you’ll need to locate the transaxle fluid dipstick. It is typically located near the transaxle and is often marked with a bright-colored handle. Refer to your vehicle’s owner’s manual if you are having trouble finding it.
Step 4: Remove the Dipstick and Wipe it Clean
Once you’ve located the transaxle fluid dipstick, remove it from the transaxle. Wipe it clean with a lint-free cloth or paper towel to remove any residual fluid on the dipstick.
Step 5: Reinsert the Dipstick and Remove it Again
After cleaning the dipstick, reinsert it into the transaxle and then remove it again. This will give you an accurate reading of the transaxle fluid level.
Step 6: Check the Fluid Level
Inspect the fluid level on the dipstick. The fluid should be within the designated range marked on the dipstick. If it is below the minimum mark, you will need to add more fluid to bring it back up to the correct level.
Step 7: Add Transaxle Fluid if Necessary
If the transaxle fluid level is below the minimum mark, you will need to add more fluid. Use a funnel to pour the fluid into the transaxle through the dipstick tube. Be sure to add the correct type of transaxle fluid recommended by the vehicle manufacturer.
Step 8: Recheck the Fluid Level
After adding transaxle fluid, reinsert the dipstick and then remove it again to recheck the fluid level. If the level is now within the designated range, you have successfully topped up the transaxle fluid.
Step 9: Reinsert the Dipstick and Close the Hood
Once you have confirmed that the transaxle fluid level is at the correct level, reinsert the dipstick and securely close the hood of your vehicle.
By following these steps, you can easily check your manual transaxle fluid level and ensure that it is at the appropriate level for optimal performance and longevity. Regularly monitoring the transaxle fluid level is an essential aspect of vehicle maintenance, and it can help you identify any potential issues before they escalate into more significant problems. If you are unsure about any of the steps or if you notice any unusual findings, it is recommended to consult with a professional mechanic. Proper maintenance of your transaxle will contribute to the overall health and efficiency of your vehicle, saving you time and money in the long run.
Post time: Feb-19-2024


