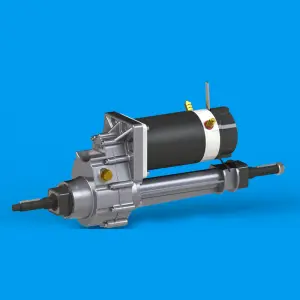
If you drive a vehicle equipped with an automatic transaxle, it’s important to regularly maintain and service the transaxle to ensure smooth operation and long service life. One of the most important maintenance tasks that is often overlooked is changing your automatic transaxle oil. In this blog, we’ll discuss the importance of changing your transaxle oil regularly and provide a step-by-step guide on how to change it yourself.
Why should you change automatic transaxle oil?
The transaxle oil in your vehicle is essential for lubricating the gears and components within the transaxle. Over time, the fluid can become contaminated with dirt, debris, and metal shavings, which can cause excessive transaxle wear. Regularly changing the transaxle oil will help maintain proper lubrication, prevent overheating and extend the life of the transaxle.
When should I change my automatic transaxle oil?
Be sure to check your vehicle’s owner’s manual for specific guidelines on when to change your transaxle fluid. However, in general, it is recommended to change the fluid every 30,000 to 60,000 miles. If you frequently tow heavy loads, drive in stop-and-go traffic, or live in a hot climate, you may need to change your fluid more frequently.
How to change automatic transaxle oil?
Now that we understand the importance of changing the transaxle oil, let’s dive into the step-by-step process of how to change the transaxle oil yourself.
Step 1: Gather materials
Before you begin, gather the necessary materials and tools. You will need:
- New transaxle oil (check owner’s manual for correct type)
- Drainage tray
- Socket wrench set
- Funnel
-rag or paper towel
- Goggles and gloves
Step 2: Locate the drain plug and fill plug
Locate the transaxle drain plug and fill plug on the underside of the vehicle. The drain plug is usually located at the bottom of the transaxle, while the fill plug is located higher in the transaxle housing.
Step 3: Drain the old fluid
Place the drain pan under the transaxle and use a socket wrench to carefully loosen the drain plug. Once you remove the plug, be prepared for the old fluid to drain out. Let the liquid drain completely into the pot.
Step 4: Check the drain plug
While draining the fluid, take the opportunity to inspect the drain plug for metal shavings or debris. If you find any obvious debris, it may indicate a larger problem with your transaxle and should be further investigated by a professional.
Step 5: Refill the Transaxle
Once the old fluid is completely drained, clean the drain plug and screw it back into place. Using a funnel, carefully pour new transaxle fluid into the fill plug opening. Refer to the owner’s manual for the correct amount of fluid required.
Step 6: Check Fluid Level
After filling the transaxle, start the vehicle and let it run for a few minutes. Then, park the vehicle on a level surface and check the transaxle fluid level using the dipstick or inspection window. If necessary, add more liquid to bring it to the correct level.
Step 7: Clean up
Dispose of old transaxle oil responsibly, such as taking it to a recycling center. Clean up any spills or drips and make sure all plugs are tightened correctly.
By following these step-by-step instructions, you can successfully change the automatic transaxle oil in your vehicle and ensure the longevity and smooth operation of your transaxle. This is a relatively simple maintenance task that can save you from costly repairs down the road. If you are unwilling to perform this task yourself, consider taking your vehicle to a professional mechanic who can complete this task for you. Remember, regular maintenance is key to keeping your vehicle running optimally.
Post time: Feb-01-2024


