
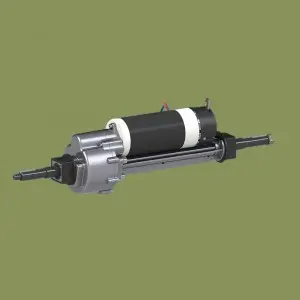
The transaxle is a key component of a vehicle’s drivetrain, responsible for transferring power from the engine to the wheels. One of the basic maintenance tasks to keep it running smoothly is to regularly check the transaxle oil level. In this blog, we’ll explore the importance of maintaining proper transaxle lubrication levels, a step-by-step process for checking levels, and provide basic tips for optimizing the performance and life of this important automotive component.
Why check the transaxle lube level?
Transaxle lubricants play a vital role in reducing friction, preventing metal-to-metal contact, and dissipating the heat generated within the transaxle. It ensures smooth gear transitions, improves fuel efficiency, and protects internal components from premature wear. Neglecting to check the transaxle lube level can lead to a host of problems such as increased friction, overheating, reduced performance and possibly even transaxle failure. Regularly checking the oil level will ensure optimum performance and extend the life of your vehicle’s transaxle.
Step-by-step guide to checking the transaxle lubricant level:
Step 1: Prepare the Vehicle
Park the vehicle on level ground, apply the parking brake, and shut off the engine. Allow the engine to cool before proceeding.
Step 2: Locate the Transaxle Dipstick
Refer to your vehicle’s owner’s manual to determine the location of the transaxle dipstick. Usually, it’s located near the engine oil dipstick.
Step 3: Remove and Clean the Dipstick
Carefully remove the transaxle dipstick and wipe it clean with a lint-free cloth or paper towel. Make sure there is no debris or contamination on the dipstick as these can affect the accuracy of the reading.
Step 4: Replug and Verify Levels
Fully reinsert the dipstick into the tube and remove it again. Observe the fluid level marked on the dipstick. It should fall within the specified range stated in the owner’s manual. If the fluid level is below the recommended range, you will need to add transaxle fluid.
Step 5: Fill the Transaxle Fluid
If the fluid level is low, carefully pour the recommended transaxle fluid specified by the vehicle manufacturer into the transaxle fluid filler. Use a funnel if necessary and avoid overfilling as it can lead to blistering and insufficient lubrication.
Tips for Optimizing Transaxle Performance:
1. Follow the manufacturer’s guidelines: Always refer to your vehicle’s owner’s manual for specific instructions on checking and changing transaxle fluid. Different vehicles may have different requirements.
2. Regular Maintenance: In addition to monitoring fluid levels, observe the recommended transaxle oil change service intervals. Fresh fluid ensures optimum lubrication and prevents potential damage.
3. Check for Leaks: Periodically inspect the transaxle for signs of leaks, such as oil spots or a burning smell. Treat any leaks promptly to prevent further damage to the transaxle system.
4. Seek Professional Help: If you notice anything unusual or feel unsure about completing a maintenance task, consult a qualified mechanic to diagnose and fix any transaxle-related problems.
Regularly checking the transaxle lubricant level is an important aspect of vehicle maintenance that should not be overlooked. By following the step-by-step guide and adhering to the manufacturer’s recommendations, you can ensure optimal transaxle performance, prolong its life, and enjoy a smoother drive. Don’t overlook this important maintenance task, because a little effort today can save you major headaches later.
Post time: Aug-28-2023